Sunday, March 28, 2010

Want to impress at a dinner party? Make this Lemon Meringue Tart!

I don't know what the weather is doing outside of Eastern Ontario, but it's sure a confusing time over here! We have summer weather before it's officially spring, and then when March 21st rolls around the temperatures drop to Winter ones and before you know it we're trading in our dresses and sandals for scarves and gloves! However, the weather is supposed to improve this coming week in Ottawa, and it's about time the weather apologized to us!

I love Spring. It marks the end of yet another winter, flowers start popping up, the weather improves by a few degrees each week, and people emerge from their cocoons and take advantage of the outdoors again. Spring baking is also loads of fun - the flavours are fresher, brighter and lighter in taste. Soon we won't have to deal with chemically pumped berries but ones that are in season and therefore at their natural best. Fruit filled desserts are a treat for the eye as well as the taste buds.

What I'm going to divulge today is my go-to recipe for Lemon Meringue Tart. Although delicious all year round, it just has a proper place in Spring and Summer. It's pretty easy to do, and to die for! You'll never want to buy it from the grocery store again!

Here are the various components that are in it:

- Lemon infused sweet dough
- Almond Cream
- Lemon curd
- Italian Meringue

Sweet Dough

200g flour
100g butter (at room temperature)
70g icing sugar
3 egg yolks
4ml milk
1 lemon, for zest
Pinch of salt

1. Pre-heat oven to 400F. Grease pie shell generously. Use one that is preferably with a removable bottom.
2. Sift icing sugar and add lemon zest and salt to it.
3. Sift flour, set aside.
4. Separate eggs - save the white for the meringue.
5. In stand-up mixer or with hand mixer cream butter until fluffy, scraping the bowl from time to time. Add icing sugar mix and beat until all is well incorporated.
6. Add yolks one at a time making sure each has been mixed in well before adding the next.
7. Add flour and beat only until everything is mixed well - don't over mix!
8. Flatten into a round and wrap in plastic wrap. Chill in fridge for 20-30 minutes, or until a little stiffer but not so hard that it can't be rolled out.
9. When dough is ready, flour your work surface and roll around dough, rotating it constantly so that all sides are of equal thickness. Dough should be no thinner than 1/4" thick. It's the right size when you place tart shell in the middle of it and you can fit 2-3 fingers on each side on the remaining dough.
10. Roll on to pin and lay into tart shell going backwards. Push dough into bottom, roll over the top with the rolling pin to remove excess dough. Pull the edges up slightly at a 90 degree angle and remove the excess with the back of a small knife. Place in fridge for 10 minutes.

Mis-en-placing (as my pastry supervisor calls it)! Clockwise, from top: Almond cream, butter, yolks, flour, naked lemon, and zesty icing sugar. Sorry there is no picture from the rolling out of the dough, that probably would have been a little helpful. D:

Almond Cream

60g icing sugar
60g butter
60g almond powder
6g flour
1 egg

1. Melt butter. Add all the dry ingredients, mix well and then add the egg. Pour into tart shell, spreading all around with a spatula or the back of a spoon.
2. Place tart shell on baking tray and put in oven. Rotate after 10 minutes. Tart and almond cream are ready when the crust and cream are slightly golden and the cream looks slightly spongey. It will firm up when it cools.


Lemon Curd

2 lemons, juiced
1 lemon, for zesting
100g sugar
100g butter
2 eggs

1. Zest lemon into sugar. Juice the lemons and strain to remove any pulp and seeds.
2. In a medium saucepan add the zesty sugar, lemon juice and the eggs.
3. Over medium heat continuously whisk until the mixture becomes thick and bubbly.
4. Remove pan from heat and add butter, whisking to dissolve it. Pour into another bowl and set aside.
5. Once cool, add to tart shell. Chill in fridge until solid.


Italian Meringue
(This can get a little tricky, so I'll do my best to explain it)

120g egg whites (about 4, and at room temperature... cold whites seem to not want to whip as well)
240g sugar
80g water
Slivered almonds

This recipe has been doubled because I always find that I'm out of meringue before I cover the whole tart, and I also can't get enough of its marshmallowey texture!

1. In mixer add whites and beat gently so that it foams, about at 2-5 setting.
2. In a small sauce pan add the sugar and water. On high heat get the sugar and water boiling. When it starts to boil run a wet pastry brush above where the sugary water is to prevent crystallization. Up the speed on the whites. You may have to lift the bowl up so the whisk touches the bottom and thus whips all the whites, not just the top.
3. Get a bowl of cold ice water (I'll get into this in a minute), or a candy thermometre. The temperature we are looking for is at 120C/240F. This is 'soft ball stage'. The sugary water will boil furiously for a bit, but it gets close when the bubbles aren't as fast.
4. If you are brave and want to get up and close with the sugar, here is what you do - when you start to see the bubbles slow down, with one hand tip the pot towards you, and dip the fingers of the other hand into the ice water. Quickly dip your cold fingers into the sugar, pulling some out and dunking your fingers and the sugar immediately into the water. When the sugar firms up and you can roll a ball and squish it, it's ready. Or you can use a thermometre, but I don't trust those things!
5. The whites should be almost at firm peaks at this point. With the mixer still running, slowly pour the sugar down the side of the bowl. If sugar strands get caught on the sides, that's ok!
6. Put the mixer on the highest setting and let it go for about 5 minutes. It will double in volume and it will be ready when you feel the bottom of the bowl and it's at body temperature. It will also stand up on its own and look like a bird beak (see photo below!).
7. With a funky pastry tip (I use the St. Honoree one from school) pipe the meringue and sprinkle some slivered almonds on top.
8. With the oven at 450F, put the tart on a baking tray and leave it in there just until the meringue and almonds have browned a little bit. No one wants burned meringue, but having it just slightly caramelized is divine!

Foamy whites!

This step looks silly but hell hath no fury like sugar crystallizing! It's like a domino effect!

The bubbles are starting to slow down. They become larger and fewer as a result.

Soft ball - it's not that scary to play with sugar!

Pour the sugar flush to the side of the bowl is ideal (I was taking this action shot so I was a little off balance), because when it's at this high speed the air from the whisking will shoot the sugar everywhere!

The meringue doubles in volume as it cools.

This is the 'big bird', as one of my school chefs would call it.

Piped meringue, pre-toasted.


You'll be worshipped for this tart, I kid you not. It's lovely for any occasion and the almond cream adds a wonderfully indulgent quality to it.

Happy baking! I'm having a unusually (but wonderful) bake-free weekend. I love what I do but sometimes taking a break helps me recharge my batteries and not become burnt out from too much baking. This upcoming week at work will be very insane as we are preparing for Easter and we have a million catering events. So far my only personal commission has been for cookies, which I love. Decorating cookies is very zen for me right now and I love figuring out what designs I'm going to do!

Thursday, March 25, 2010

Tragic news

A few months ago I received a phone call from a woman who is a friend of one of my wedding clients. This woman is the maid of honour for her friend's wedding and she wanted to order a bridal shower cake from me. The mother of the bride had completely taken over the wedding and this cake was to be a fun jab at this fact by having a nice Tiffany-blue cake, decorated with white scrolls, and then a figure of a bride wearing a Metallica t-shirt juxtaposed on top of the cake.

The writing was to say 'May Jesse rock your world forever. Congratulations, Jaimen!'. A sweet and fun message.

Today I receive a phone call from the maid of honour with horrible news - the fiance of the bride was killed in an accident this morning.

I am so shocked an saddened by the news and my thoughts and sympathy go out to Jaimen and Jesse's family. I am so sorry for your loss.

To anyone reading this that works in, or knows someone in labour like this - keep safe at all times. This was a horrible, horrible accident that shouldn't have happened.

Sunday, March 21, 2010

Red, Lemon, and Cheesecake all over!

This has been a very topsy-turvy week - my pastry head adjusted our schedule mid-week so that we would have more days together, thus enabling us to get more Easter themed desserts out ahead of time. So this week I have had not one, but two weekends! I had Wednesday and Thursday off, and now Sunday and Monday. No complaints here, I've really needed the time off to relax. I've been dealing with some nasty heartburn and general tummy troubles. Suspecting that my high consumption of caffeine could be the culprit, I've completely cut it out to see if it would have any effect. It's been quite a few days and no heartburn! Though I have to say, my caffeine addiction runs deep - the headaches are quite bad and the fatigue even worst. However, today is day 6 and it's getting a little easier. Will I ever drink coffee again? Of course, but only after Easter has passed and my stress levels go down as a result.

On to the cakes! My most loyal client, 107 4th Avenue Wine Bar wanted something different for one of the two orders for this week, so I suggested Red Velvet cake with Vanilla Bean buttercream. Of course, this is delicious. I'm not the biggest fan of using so much dye, and I actually might take some out because it does get quite scary red! I also didn't have buttermilk on hand, but several sources said that you substitute sour cream and yoghurt for the buttermilk, so I did just that! However, this makes for a much thicker batter, and also makes the cake a little more dense, and this cake is dense to begin with!


Of course, I had a little batter left over for cupcakes ;D.


I've had very little editing to do on these photos so far - the natural light seems to be my friend this week!

Next up, cheesecake! I had my parents over for dinner tonight and I wanted to make a nice dessert for them as they so rarely get to fully taste the fruits of my education they so lovingly paid for. I had leftover cheesecake batter, so with a little coffee extract and a teaspoon of cinnamon I created a delightful cinnamon coffee New York cheesecake with chocolate cookie crumb base.

The ratio of cheesecake to crust in my first run was vastly different, so this time I kind of overcompensated... oh well, it was delicious!


And wine! Because this one is going to replace the Fuzion that I've been drinking for months and months. Wonderful body and depth of flavour for a good price, around $10 a bottle I believe?

For those that read this blog I would like share with you the recipe for Lemon Polenta cakes that I found in Delicious magazine. These are seriously the easiest things in the world to make and are the biggest crowd pleaser ever!


Lemon Polenta Cakes

225 g unsalted butter, at room temperature, plus extra for greasing
225 g caster sugar (I used regular granulated)
3 eggs, lightly beaten
110 g ground almonds
110 g shredded coconut
110 g fine polenta (and by polenta they mean cornmeal)
Finely grated zest of 2 lemons, plus 2 1/2 tbs lemon juice (hah, I forgot the lemon juice, which actually made for a nice subtle lemon taste)
1 tsp baking powder (don't be silly like me and accidentally put 1 TABLESPOON! eeeek!)
1 tsp vanilla bean paste (I put in a tablespoon... again by accident... but it tasted fantastic!)

Icing

225 g icing sugar, sieved
2 tbs lemon juice

NOTE: I didn't make this icing this time around, but I'm sure it's ok, albeit a bit too much lemon, unless you like that.

Preheat the oven to 150 C (my sketchy mental conversion says this is actually 300 F, and that worked fine!). Grease 36 holes in 2 mini muffin trays well (I made regular muffins/cupcakes... so methinks this actually yields about 20-24, depending on how full you fill the cups).

Beat the butter and sugar in an electric mixer for 2 minutes or until lump free (it doesn't need to be light and fluffy). Slowly beat in eggs, then fold in ground almonds, coconut, polenta, lemon zest, lemons juice, baking powder and vanilla. Divide among muffin pans, then baked for 20-30 minutes until the cakes are golden. Cool in the pan, then turn out onto a wire rack or plate.

For the icing, mix the sugar and lemon juice in a bowl until smooth. Spoon over the cakes, letting the icing dribble down the sides a little. Leave the icing to set before gobbling up with your friends.


Pretty much anything goes with these cakes. First I put some blackcurrant cream on them, then on this batch I put on some leftover caramel buttercream. These little cakes are so adaptable and delicious with whatever topping you want!

I find myself quite jaded with baked goods at times, but these cakes made me feel like I was indulging in desserts for the very first time again. My innocence returned! The angels sang! And I ate three of these in a row!

Next post will be a detailed description on how to make my (and by 'my', I mean I took it from my Cordon Bleu coursework) lemon meringue tart. I am a firm believer that everyone needs a good lemon meringue tart in their dessert arsenal! Spring has finally sprung (despite the snow that the Weather Network is trying to dangle over our heads), so let's break out the fresh and bright flavours!


Monday, March 15, 2010

Weekends are never lazy over here

Happy Monday! ... I don't know why I'm so chipper about that, it hasn't been the best of days. However, the work day is over and tomorrow will be better.

I had this past weekend off so on Saturday I decided to treat myself to a fancier breakfast than my usual muesli and soy milk - I made Breakfast Blini's, which came from this book:


A favourite! I love the photography and the simplicity of the recipes. It's also British, which means everything is weighed in grams, my favourite < / endnerdhere >.

Looks like slop, but wait!


Almost...


There we go!


Topped with frozen blueberries, yoghurt and agave (no maple syrup, but this was a delicious substitute!), it was a wonderful and fairly healthy breakfast. Easy too!

Breakfast Blinis
Serves 4

125 g (4 oz) self-raising flour (I used all purpose)
1/2 tsp ground cinnamon
15 g (1/2 oz) caster sugar (I used raw cane)
grated zest of 1 orange (no oranges, limes instead!)
50 g (20 oz) sultanas (the only raisins I had are in raisin bran, so I cut up dates in their place)
1 egg
200 ml (7 fl oz) milk (I used soy)
50 g (2 oz) bran flakes, crumbled (raisin bran, baby!)
a little olive oil (coconut oil was my greaser of choice)

1. Sift the flour and cinnamon together into a bowl. Stir in the sugar, grated orange zest and sultanas, then make a well in the centre.

2. Beat the egg with the milk, then pour into the well. Stir to combine and form a smooth batter. Stir in the crumbled bran flakes.

3. Heat a large non-stick frying pan, then wipe with kitchen paper dipped in olive oil. Drop tablespoonfuls of the batter into the pan, spacing them well apart to allow room for spreading. Cook for 2 minutes until set and golden underneath, then turn with a palette knife and cook for a further 2 minutes.

4. Serve warm, with yoghurt or fruit if you'd like.

Easy peasy! So good!

On Sunday my boyfriend and I hosted a dinner party for his family, and the parents of his best friend.

Saffron Chicken with Cilantro and Almonds


Lemon Polenta Cakes with Blackcurrant Cream


A roaring success overall!

Today I made a traditional favourite for an order - banana coconut cream pie.


I used coconut cream instead of just coconut milk and it made for a much richer flavour. My bananas were also at a perfect ripeness. I'm actually jealous that I didn't get to eat this!

I leave you all with this teaser - what will this become?!


Monday, March 8, 2010

Cakes, condos, and more raw adventures!

First off, I'd like to mention that I have finally moved into my new condo with my boyfriend. We've been living here officially for a week now and we absolutely love it. It's also got a much cooler colour scheme than that of my parent's home so my forthcoming pictures will look less dark and overwhelming. It also doesn't help that we're on the 3rd floor and south facing. Lots of sun! Which also means if I ever need to get butter soft for buttercream, the microwave isn't necessary... I have my 82 degree apartment to do it for me!

Secondly, I'm learning how to make my pictures look better. I don't have a fancy-schmancy camera so I'm relying on iPhoto to help me out, so bear with me as I experiment my way to prettier food photos!

It's always an adventure trying out new stoves and ovens, seeing how long it takes to heat up, how off the oven temperature actually is, etc.

First picture is of my signature cake - Chocolate Cardamom Cake with Muscovado (or Demerara, depending on what's on hand) French Buttercream and Caramel. I used to use a Genoise cake, which is a traditional French sponge cake. I had received feedback saying that it gets a little dry after a few days. This is true, as it barely has any fat to keep it moist, and it rises purely because you whip so much air into the eggs and sugar that it rises like a souffle. And like any baked good that only has air in it to keep it up, it gets dry eventually. So after a bit of research I found a new cake that I think will be a good replacement. It also happens to be HUGE.


This cake is around 3"-4" high. Lots of slices!

I have been feeling very unhealthy recently. I know, I know, I'm a pastry chef so consuming tons of refined sugar on a daily basis goes with the territory. Perhaps it is a bit of an oxymoron but I am very conscious about my health and maintaining a good balance of the good and indulgent. I used to do eat things in excess but now find them more enjoyable if I have them once in awhile. However, at work I've been sampling far too much and I do notice a change in my cravings and my skin. But I do have a sweet tooth, so what am I to do? Well, make raw chocolate mousse of course!


I found this on Rawmazing. This is the first time that I've been to their site, and I was so delighted with the result that I hope to find more raw desserts that satisfy my cravings. Instead of using a full 3/4 cup of cacao (different than cocoa... not refined. You can find this in health food stores at a pretty penny), I used 2/4 cocao and 1/4 carob, because I like the malty taste. I also used cashew butter instead of almond because that's all I had on hand.


I tried to feed this to my boyfriend pretending that it was regular chocolate mousse, but he could tell right away that it wasn't. Foiled again! He said it tasted very powdery and that if I could somehow dissolve the cocao/carob in the almond milk than that might improve the texture and taste. We'll see how that goes next time! I like that this has a lot of good things in it, yet it tastes so rich and indulgent.


I'm also in love with the robin's egg coloured tea cups that I got from my Omi. Perfect pretty mousse cups!

Today was one of my day's off so I went with my mum to a couple of kitchen stores to buy St. Patty's Day and Easter cookie cutters. Being the addict that I am, I bought a cookbook... Oops.


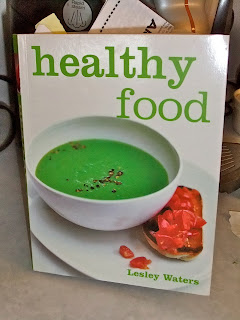
I put off buying this book for awhile, but then as I kept browsing through it I knew I had to get it. I hope to someday get into vegan and gluten-free baking. There was a glimmer of working in a vegan bakery at one point, but alas it wasn't to be, so for now I will practice on friends and family! I find it to be a huge challenge to recreate baked goods with no eggs, butter, and flour so I think this will be a good first step. Then I will take my knowledge and apply it to recipes that I currently have.

The book I really want right now is Raw Food Real World. Next time!

I messed about with a cropped version of one of 'mousse and me' photos, so I think I'll make a nice header out of that soon. I also have someone making me new business cards - I'm so excited!